A Step-by-Step Guide to Dev Lite 100 Inch Projector Screen. Ever wondered why movies look dull on a plain wall? Many in India face poor image quality without knowing the cause. A home theater screen changes everything, creating the perfect surface for light.
A Step-by-Step Guide to Dev Lite 100 Inch Projector Screen
A dev lite 100 inch projector screen keeps your visuals bright, colorful, and clear. Unlike walls or sheets, these screens avoid hotspots and distortion. They’re perfect for any space, from offices to outdoor areas.
This guide will show you how to set up your projector screen. We’ll help you create a theater-like experience in your home.
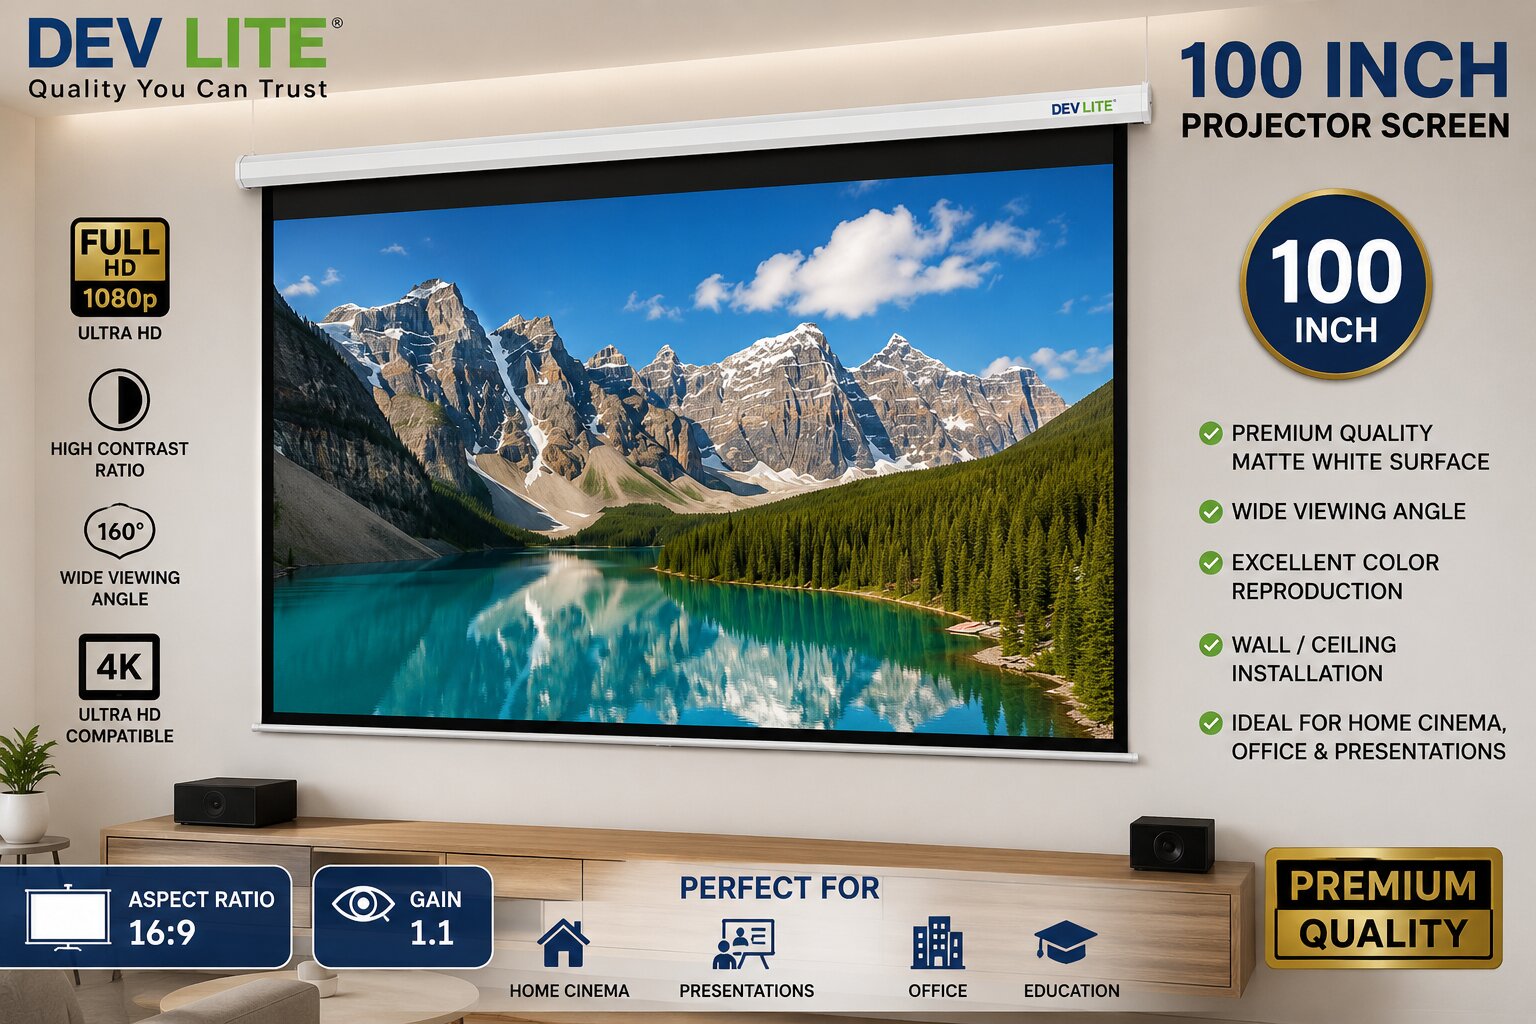
DEV LITE 100 INCH D EYELET SCREEN 7.25FTX 5FT Projector Screen
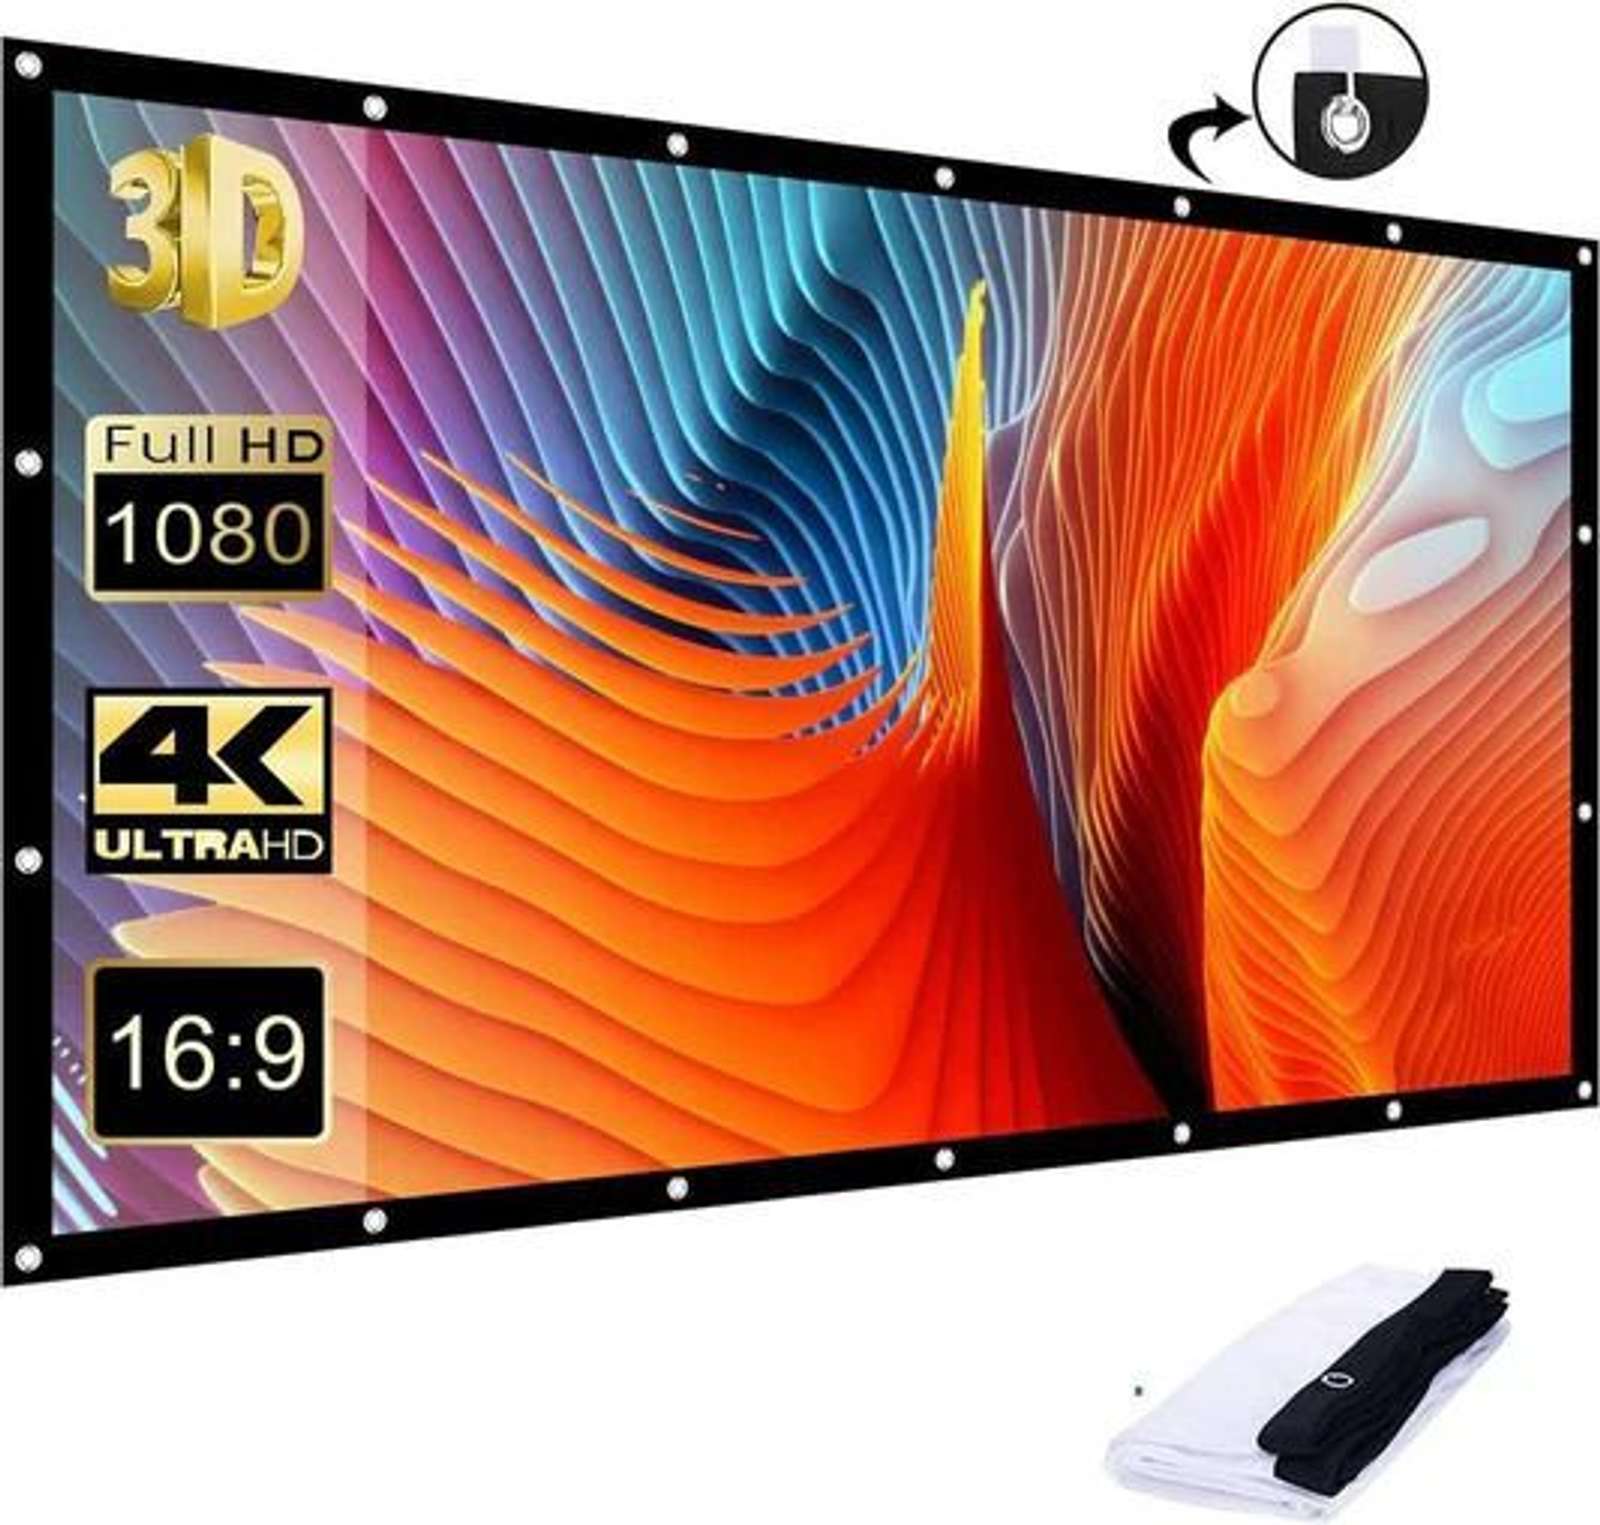
Dev Lite 100 Inch Projector Screen
- 7 Days Return
Cash on Delivery - Screen Material Matte White
Mount Type Wall Mounting
Frame Type 1 Foldable Projector Screen
Auto Locking No
Pull Down Handle No
Frame Material Steel and matt white
Tripod Material NA
Other Body and Design Features 65 INCH EYELET SCREEN
In the Box
pack of 1
General
Brand DEV LITE
Model Number 100 INCH D EYELET SCREEN 7.25FTX 5FT
Viewing Width 213.36 cm
Viewing Height 152.4 cm
Type Fixed Screen
Viewing Angle 179 degree
Suitable For Home Cinema,Schools, Colleges, Board Rooms, Teaching Institutes, Banquets, Class Rooms
Operation Type Manual
Aspect Ratio 16:9
Color White
Brand Color white
Features
Full HD, 3D, Ultra HD (4K)
Additional Features
Washable No
Portable Yes
Other Features
FOLDABLE, PORTABLE
Dimensions
Viewing Height 152.4 cm
Viewing Width 213.36 cm
Frame Width 132 cm
Frame Height 152 cm
Weight 0.6 kg
Other Dimensions 213 cm x 152 cm
Key Takeaways
- Dedicated surfaces provide superior color accuracy compared to painted walls.
- Proper installation is essential for achieving a flat, wrinkle-free viewing area.
- High-quality materials prevent light leakage and enhance overall image sharpness.
- These setups are versatile enough for residential, educational, and professional use.
- Following a systematic guide ensures a durable and long-lasting home theater configuration.
Prepare the Dev Lite 100 Inch Projector Screen and Installation Area
Setting up your home cinema starts long before you pick up a drill. Taking the time to organize your workspace ensures that your projector screen installation goes smoothly and safely.
Check the Dev Lite Screen and Included Mounting Hardware
Begin by carefully unpacking your new equipment on a clean, flat surface. Verify that all components are present and free from damage before you begin the mounting process.
Inspect the 100 Inch Screen Surface, Frame, Casing, and Accessories
Examine the 100 inch screen material for any creases or blemishes that might affect image quality. Ensure the casing of your dev lite screen is sturdy and that all mounting brackets, screws, and fasteners are included in the box. A Step-by-Step Guide to Dev Lite 100 Inch Projector Screen.
Choose a Suitable Room in an Indian Home
Selecting the right room is vital for achieving the best picture quality. In many Indian homes, you must account for specific environmental factors that can interfere with your viewing experience.
Control Windows, Ambient Light, Fans, and Reflective Surfaces
Strong daylight from windows can wash out your image, so choose a wall that avoids direct sunlight. Here are some tips to optimize your lightweight projector screen setup:
- Use heavy curtains to block external light during the day.
- Position the screen away from ceiling fans to prevent unwanted movement or flickering.
- Avoid placing the screen opposite highly reflective surfaces like glass cabinets or polished marble floors.
- Ensure the wall is smooth and free of moisture or dampness.
Gather the Tools and Safety Equipment
Having the right tools ready will save you time and frustration. A well-prepared workspace is the hallmark of a professional installation. A Step-by-Step Guide to Dev Lite 100 Inch Projector Screen.
Use a Measuring Tape, Level, Drill, Wall Plugs, and Stud Finder
Before you start, gather these essential items to ensure your dev lite screen is mounted perfectly straight. Using a reliable level is non-negotiable for a balanced image. A Step-by-Step Guide to Dev Lite 100 Inch Projector Screen.
| Tool | Purpose | Importance |
|---|---|---|
| Measuring Tape | Accuracy | High |
| Spirit Level | Alignment | Critical |
| Power Drill | Mounting | High |
| Stud Finder | Safety | Critical |
Always wear safety goggles when drilling into concrete or brick walls common in Indian construction. Proper preparation protects your lightweight projector screen and ensures it remains secure for years of entertainment.
Measure the Viewing Wall and Plan the Screen Position
Turning a wall into a top-notch entertainment spot is all about placement. Before you start, make sure your wall can hold all your gear. This ensures your dev lite 100 inch projector screen fits perfectly in your space.
Confirm the Dev Lite 100 Inch Projector Screen Dimensions
Account for the Screen Border, Housing, Brackets, and Clearance
Don’t just measure the screen’s white part. You need to include the whole housing unit, which adds inches. Always check the manufacturer specifications for the exact dimensions of the mounting brackets and the black border.
Make sure there’s enough space around the housing for it to work without issues. A 100 inch screen needs a flat, clear area without wall switches or shelves. This avoids damage to the screen when you set it up.
Mark the Horizontal Center of the Wall
Align the Screen With the Seating Area and Projector Lens
Finding your wall’s center is key for a balanced image. Use a tape measure to mark the middle with a pencil. This mark should match your main seating area for the best view. A Step-by-Step Guide to Dev Lite 100 Inch Projector Screen.
Also, align this mark with your projector lens. This reduces the need for digital keystone correction, keeping your high-definition screen quality high. A straight line from the lens to the screen is best for clear images.
Calculate a Comfortable Viewing Height
Keep the Main Viewing Area Near Seated Eye Level
Comfort is key for long movie nights or gaming. The bottom third of your 100 inch screen should be at or slightly above your eye level. This avoids neck pain and makes the experience feel like a real cinema.
Test your seating before setting the screen height. If you’re on a low sofa, mount the screen lower. This keeps your dev lite 100 inch projector screen comfy for hours. A Step-by-Step Guide to Dev Lite 100 Inch Projector Screen.
Check the Projector-to-Screen Distance
Match Throw Distance With the Projector’s Lens and Zoom Specifications
The distance between your projector and the wall affects the image size. Check your projector’s manual for its throw ratio. This ratio tells you how far back the projector needs to be for a full high-definition screen image.
Most projectors have zoom, giving you some flexibility. But aim for the best focus and brightness by matching the throw distance to your room. This ensures a sharp, bright picture every time you use your 100 inch screen.
Mount the Dev Lite 100 Inch Projector Screen Securely
A secure installation is key for a great home cinema. Whether it’s a permanent theater or a portable screen, the mount’s strength matters. It affects how well your display works over time.
Install the Mounting Brackets or Wall Supports
First, make sure you have the right hardware for your wall. In India, homes often have brick or concrete walls. These need heavy-duty masonry anchors, not regular wood screws. A Step-by-Step Guide to Dev Lite 100 Inch Projector Screen.
Mark Level Pilot Holes and Select Suitable Fasteners
Use a spirit level to mark pilot holes correctly. Precision here stops a crooked image later. Drill the holes and put in wall plugs for a firm projector screen. A Step-by-Step Guide to Dev Lite 100 Inch Projector Screen.
Attach the Screen Housing to the Supports
Lift the housing carefully and align it with the brackets. Having someone help you is a good idea. It prevents drops or damage to the casing. A Step-by-Step Guide to Dev Lite 100 Inch Projector Screen.
Secure Every Connection Without Over-Tightening the Hardware
Tighten bolts until they’re snug but don’t overdo it. Too tight can damage the dev lite screen. This might harm the retraction mechanism. A Step-by-Step Guide to Dev Lite 100 Inch Projector Screen.
Mount the Screen on a Ceiling When Wall Space Is Limited
Mounting on the ceiling is a good option if walls are full. It keeps the wall clear and adds a professional touch to your home theater. A Step-by-Step Guide to Dev Lite 100 Inch Projector Screen.
Use Ceiling Anchors Rated for the Screen’s Weight and Movement
Choose high-quality ceiling anchors that can handle the screen’s weight. Make sure they’re suitable for your ceiling material to avoid sagging. A Step-by-Step Guide to Dev Lite 100 Inch Projector Screen.
Verify Stability Before Lowering the Screen
Do a final safety check before lowering the dev lite screen. A stable mount ensures the screen hangs flat and wrinkle-free. A Step-by-Step Guide to Dev Lite 100 Inch Projector Screen.
Check for Tilting, Loose Screws, and Obstructions Along the Drop Path
Gently tug on the housing to check for stability. Make sure there are no obstructions in the portable screen‘s path as it descends. A Step-by-Step Guide to Dev Lite 100 Inch Projector Screen.
Follow Electrical and Household Safety Precautions
Safety is always first during installation. Proper cable management keeps your equipment and family safe.
Keep Cables Away From Heat, Moisture, and Children’s Reach
Keep power cords away from heat and direct sunlight. Use cable clips to secure wires against the wall. This keeps them out of children’s and pets’ reach, preventing tripping hazards for your projector screen.
Position and Connect the Projector for a Straight Image
Getting the best picture quality starts with how you position your projector. It’s more effective than digital settings to fix image geometry. By setting up your home theater screen correctly, you get a sharp and immersive view.
Place the Projector at the Correct Height and Distance
Position the Lens Near the Screen’s Horizontal Centerline
For the clearest image, the projector lens should align with the screen’s centerline. If it’s too high or low, the image will be distorted. Always check your projector manual for the correct “throw distance” for your 100-inch display.
Keep the Projector and Screen Parallel
Prevent Keystone Distortion by Avoiding Excessive Angles
The projector must be perfectly parallel to the wall where your lightweight projector screen is mounted. Tilting it up or down forces digital keystone correction, which can lower image quality. Keeping it level preserves the natural geometry of your content. A Step-by-Step Guide to Dev Lite 100 Inch Projector Screen.
Connect the Projector to the Video Source
Use HDMI, Streaming Devices, Laptops, or Set-Top Boxes
Modern setups offer various input methods for high-quality video. Use high-quality HDMI cables for streaming sticks, laptops, or set-top boxes. Below is a quick guide to common connection types for your setup.
| Connection Type | Best Use Case | Signal Quality |
|---|---|---|
| HDMI Cable | Blu-ray & Gaming | Excellent |
| Streaming Stick | OTT Apps & Movies | Very Good |
| Laptop/PC | Presentations | Good |
Manage Power and Signal Cables Neatly
Leave Enough Slack for Maintenance Without Creating Trip Hazards
Cable management is key for safety and looks in an Indian home. Use cable ties or wall-mounted channels to keep wires organized. Always leave some slack near the projector for adjustments or maintenance without straining the ports. A Step-by-Step Guide to Dev Lite 100 Inch Projector Screen.
Lower, Align, and Calibrate the Dev Lite 100 Inch Projector Screen
To get the best picture, you need to calibrate your setup carefully. First, make sure the dev lite 100 inch projector screen is set up right in your home. A Step-by-Step Guide to Dev Lite 100 Inch Projector Screen.
Lower the Screen Smoothly for the First Test
Start by slowly pulling the handle to lower the screen. Move it gently to avoid any sudden movements.
Stop at the Desired Viewing Format Without Forcing the Mechanism
Keep pulling until the screen is at your preferred height. If it feels hard to move, stop right away. This prevents damage to the screen’s mechanism. Let the screen lock into place before testing.
Center the Projected Image on the Screen Surface
Getting the image right in the middle is key for a pro look. You want the light to hit the center of the 100 inch screen perfectly. A Step-by-Step Guide to Dev Lite 100 Inch Projector Screen.
Adjust Projector Placement Before Relying on Digital Keystone Correction
Try to adjust the projector’s position to get the image right before using digital settings. Using digital correction can lower image quality. Moving the projector a bit keeps your high-definition screen looking sharp.
Set the Image Size and Focus
Turn on the projector to display a test pattern. This lets you see how the image fits with the screen.
Fill the Visible Screen Area Without Cropping the Edges
Adjust the zoom and focus until the image fits the screen perfectly. Make sure no light spills over the black borders. A clear, framed image is essential for a great experience. A Step-by-Step Guide to Dev Lite 100 Inch Projector Screen.
Adjust Brightness, Contrast, Color, and Sharpness
Adjust your projector settings based on your room’s lighting. Start with the factory defaults and make small changes as needed. A Step-by-Step Guide to Dev Lite 100 Inch Projector Screen.
Use Cinema or Standard Modes for Movies, Sports, and Presentations
Most projectors have presets for different media types. Use Cinema mode for movies for better blacks and colors. Switch to Standard mode for sports or presentations to brighten the image in light rooms.
Test Full-HD and High-Definition Content
Play a high-quality video to check your setup’s performance. This test can reveal any issues that might affect your viewing. A Step-by-Step Guide to Dev Lite 100 Inch Projector Screen.
Look for Uneven Focus, Wrinkles, Hotspots, and Color Changes
Watch for any distortions or light reflections that might indicate a problem. If you see wrinkles, check that the screen is straight and not blocked by anything. A Step-by-Step Guide to Dev Lite 100 Inch Projector Screen.
| Issue | Potential Cause | Recommended Fix |
|---|---|---|
| Blurry Edges | Incorrect Focus | Adjust the lens focus ring |
| Image Distortion | Keystone Settings | Reset keystone to zero |
| Visible Wrinkles | Uneven Tension | Retract and re-lower slowly |
| Color Shifts | Wrong Picture Mode | Switch to Cinema or Standard |
Improve Viewing Quality and Maintain the Portable Projector Screen
To get the most out of your home cinema, you need to do more than just set up your equipment. By tweaking your environment and following simple care steps, your projector screen will show bright, clear images for many years.
Create a Better Home Theater Viewing Environment
Dim Lights, Reduce Reflections, and Arrange Seats Within the Viewing Area
Too much light can ruin your picture. Use thick curtains or blinds to block out sunlight. Also, turn off overhead lights to stop glare on your 100 inch screen. A Step-by-Step Guide to Dev Lite 100 Inch Projector Screen.
Make sure your seats are right in front of the screen for the best colors. Stay away from shiny things like glass tables or mirrors near the screen. They can reflect light back onto the screen.
Use the Dev Lite Screen for Movies, Gaming, and Presentations
Choose Suitable Picture Settings for Each Type of Content
Different types of content need different settings. For movies, choose high contrast and warm colors for that movie feel. A Step-by-Step Guide to Dev Lite 100 Inch Projector Screen.
For gaming, use “Game Mode” if it’s available to cut down on lag. Presentations need brighter and sharper settings to make text clear on your portable screen. A Step-by-Step Guide to Dev Lite 100 Inch Projector Screen.
Clean the 100 Inch Screen Safely
Remove Dust With a Soft, Dry Microfiber Cloth
Don’t use harsh chemicals or rough sponges on the screen. Use a soft, dry microfiber cloth to gently wipe away dust. A Step-by-Step Guide to Dev Lite 100 Inch Projector Screen.
If a spot won’t come off, use a tiny bit of water on the cloth. Let the screen dry completely before you roll it up.
Store or Retract the Lightweight Projector Screen Correctly
Keep the Screen Dry, Protected, and Free From Pressure or Creases
When not using your lightweight projector screen, roll it up slowly to avoid damage. Keep the room dry to prevent mold or warping. A Step-by-Step Guide to Dev Lite 100 Inch Projector Screen.
Don’t put heavy things against the screen. Store it in a cool, dry place to keep the fabric in good shape.
DEV LITE 100 INCH D EYELET SCREEN 7.25FTX 5FT Projector Screen
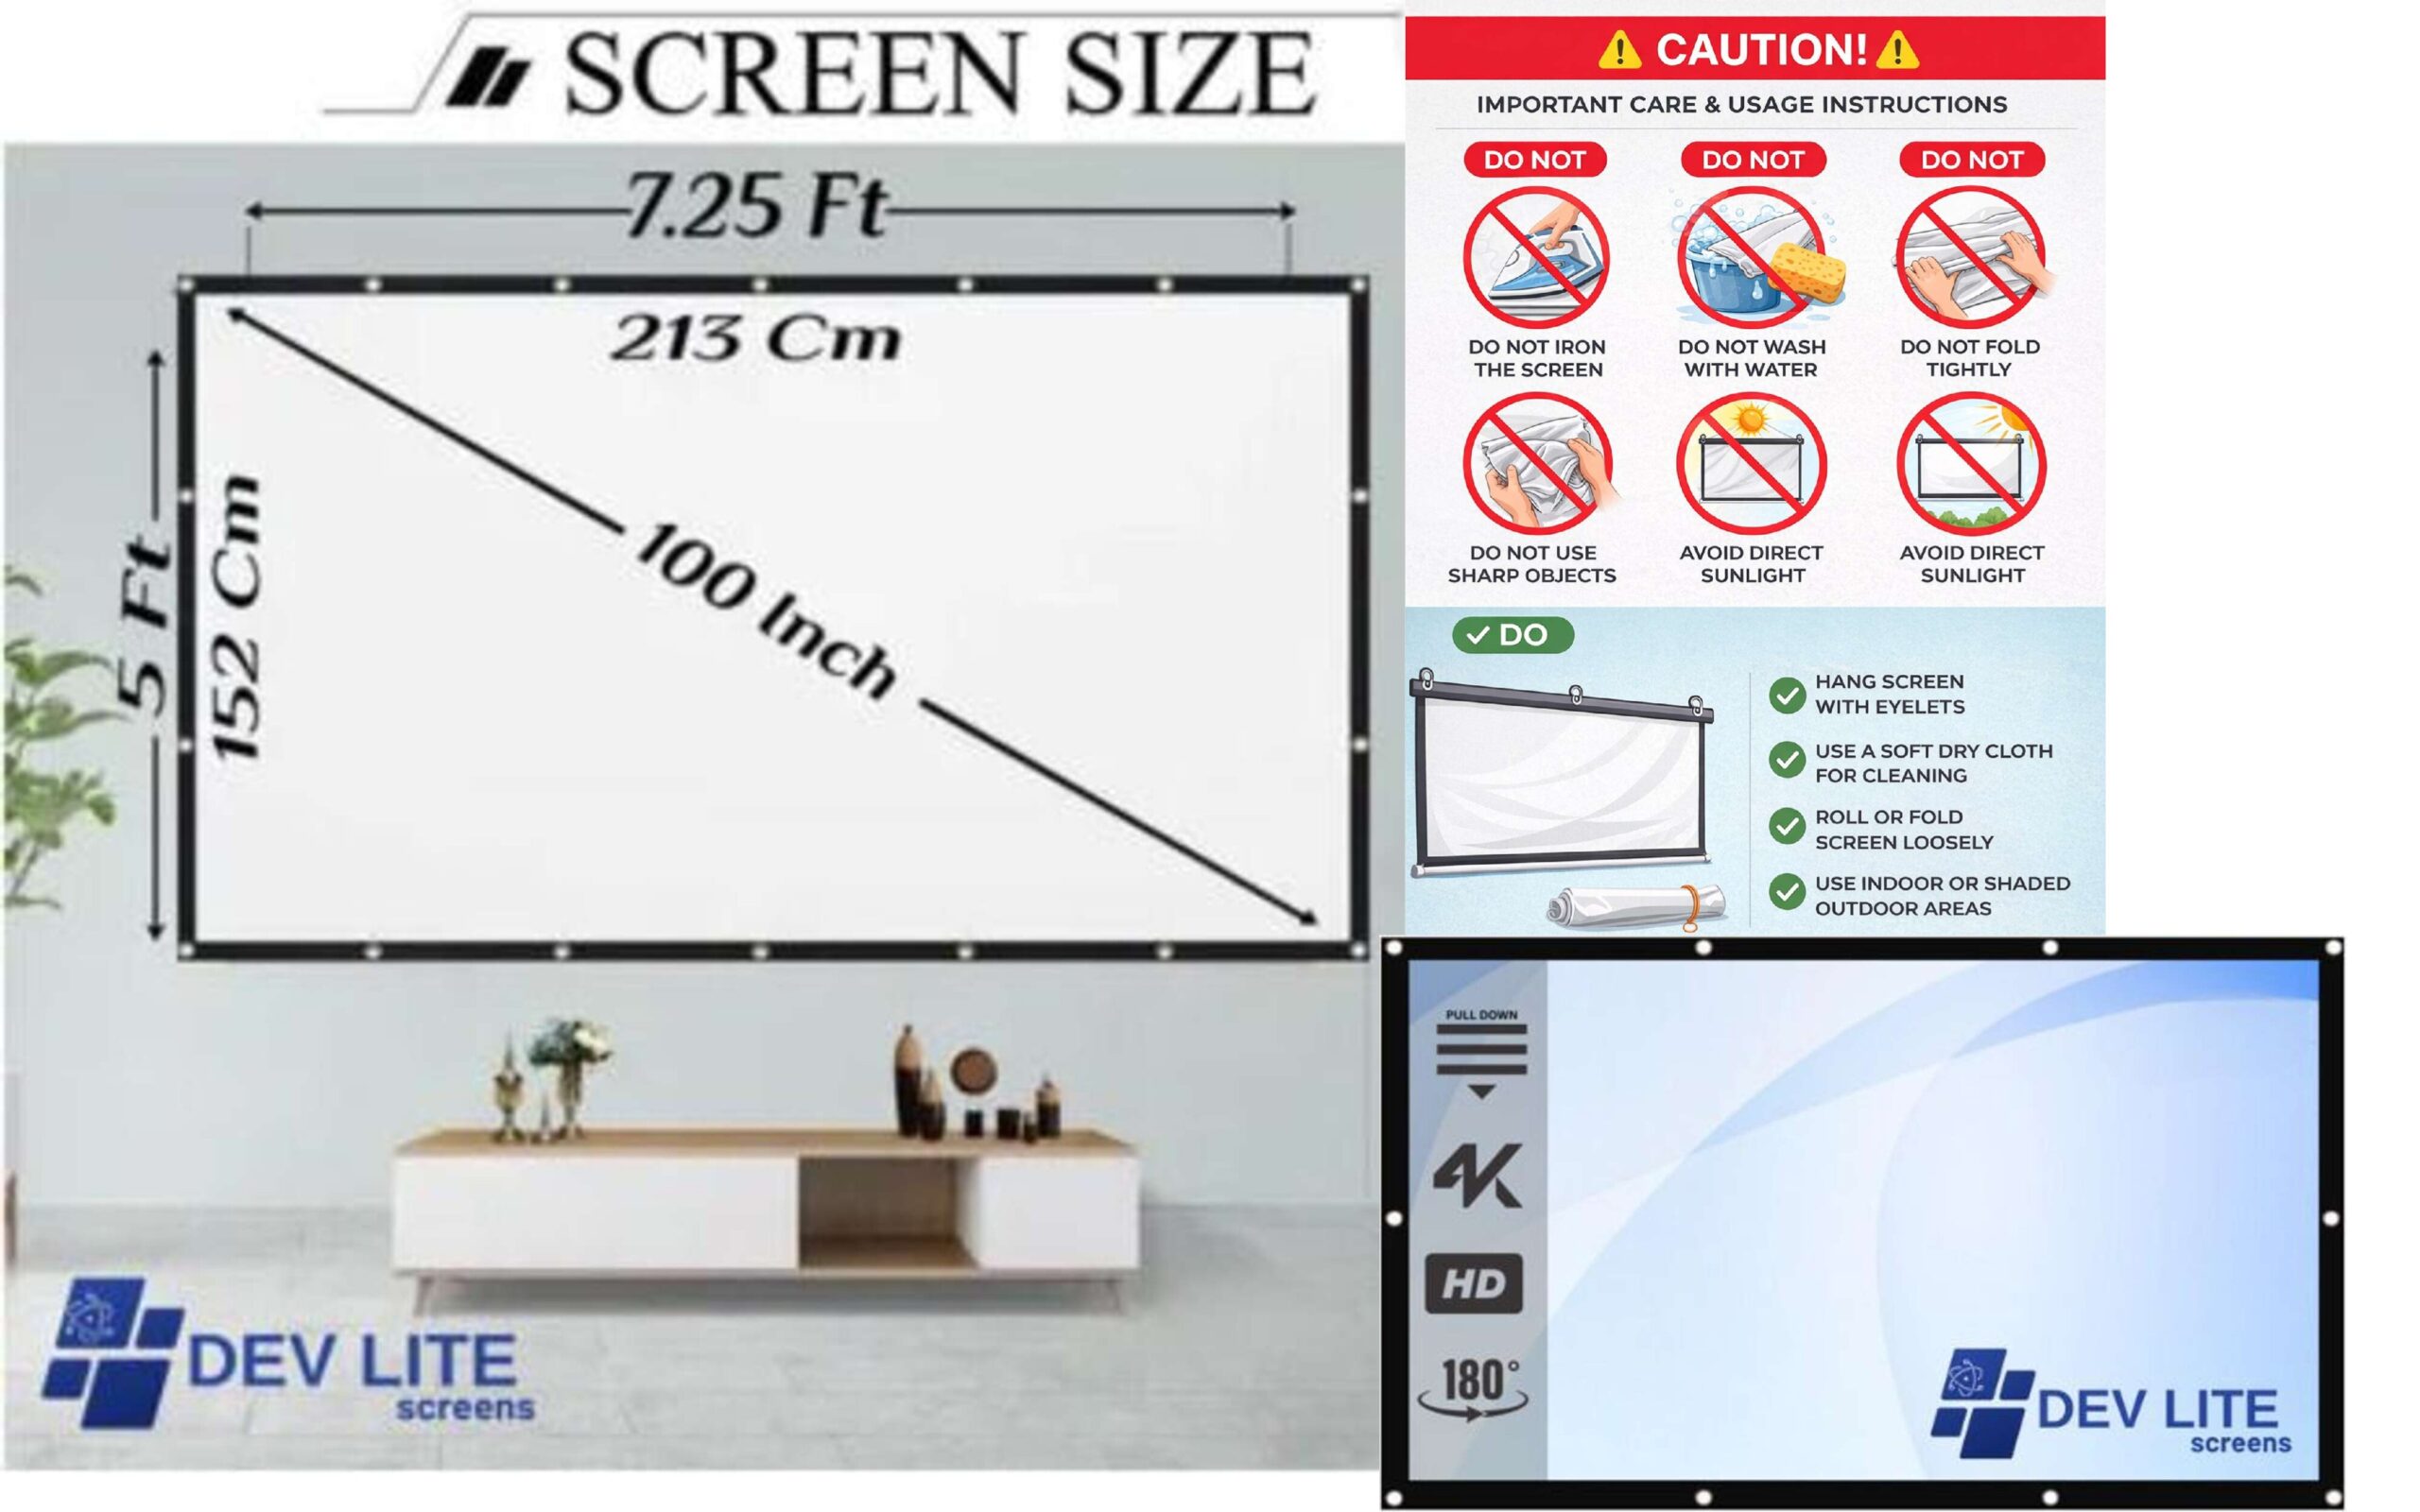
Dev Lite 100 Inch Projector Screen
- DEVLITE screens EYELET PROJECTION SCREEN PROVIDE FULL HD QUALITY EXPERIENCE FOR BOTH HOME AND OFFICE PURPOSE, EASY TO MAINTENANCE AND CAN BE CLEANED EASILY BU SOAP WATER, ITS UV COATING PROTECT THE EYES. EASILY CAN BE FIXED ON IRON OR WOODEN FRAME.
Troubleshoot Common Installation and Image Problems
Correct Wavy Edges, Misalignment, Dim Images, and Unexpected Movement
If you see problems, check the table below for fixes. Most issues come from small alignment mistakes or environmental factors.
| Problem | Likely Cause | Recommended Solution |
|---|---|---|
| Wavy Edges | Uneven tension | Check mounting level |
| Dim Image | Ambient light | Darken the room |
| Misalignment | Bracket shift | Re-level the housing |
| Unexpected Movement | Loose hardware | Tighten all screws |
Conclusion
Setting up your home entertainment space needs careful planning. A good installation of the dev lite 100 inch projector screen starts with precise measurements. It also requires secure mounting techniques. These steps help keep your setup stable and reliable for years.
Your choice of equipment should fit your room and seating. Whether it’s for a home theater or a portable screen, image quality matters. Make sure your projector is parallel to the screen to avoid distortion and keep the image sharp.
Regular maintenance is key to keeping your screen in top shape. Gently wipe the surface to remove dust and retract the housing after use. This simple habit helps protect your screen from damage in busy homes.
Follow this checklist for a great cinematic experience at home. Proper preparation leads to better results and lasting satisfaction. Start your journey to a professional display today by applying these principles to your space.